Politécnico de Lisboa (IPL) — institutional and academic framework (Escola Superior de Educação de Lisboa, Campus de Benfica, U!REKA network)
FabLab Benfica — host lab, fabrication tools and exchange context
Agenzia O.L.Tr.E. Formazione — mAInSTreet programme: mobility, documentation and digital innovation
Regione Piemonte — support through its transnational mobility programme
Università di Torino — coordination and residents' stay
Antenna Foundation — vision and technical, civic and educational direction of the Sun Factory Project
Residência Universitária de Benfica — accommodation
Organisers & Supporters
André Rocha — FabLab Benfica / IPL, residency organiser
Daniel Osika — local working framework and participant reception
Marcello Tamburini & Mahdi Hasanzadeh — Università di Torino, coordination between teams
Marco Bernardo — Antenna Foundation, Sun Factory Project guidance
Alexandre Scerri — Antenna Foundation, AI tools and knowledge structuring
Gianni Mirisola — residency documentation
"We have the sun and we have the machine, then we can make everything — plastic, food, cold, electricity, water. We make commons: things that we use commonly, which have no patents."
— Sara Proietti, Sun Factory Lisbon 2026
solar energyplastic recyclingFabLabopen-sourcecircular economyeducator guideworkshop
PART I — UNDERSTAND THE PROJECT
Before building, understand why and how — the vision, principles, and science behind solar plastic recycling.
Sun Factory Project is an international contributive initiative that empowers local communities through solar energy for artisanal manufacturing. Based in Geneva and supported by the Antenna Foundation, the project develops simple, open-source machines to capture the heat of the Sun for multiple applications: cooking, puffed cereals, recycling plastic, and all solar thermal processes — alongside photovoltaic solutions. All documentation is shared under CC BY-SA 4.0 and hardware designs under CERN-OHL-S-2.0 — free to copy, modify, and redistribute — as long as you credit the authors and keep it open.
The Big Idea: Sunlight + Circular Economy
Renewable energy: Instead of burning fuel, mirrors concentrate sunlight to reach high temperatures (up to 300°C)
Circular economy: Instead of throwing plastic away, we melt it and give it a new life as a useful object
Community independence: The instructions are free — teaching communities to build, repair and use the technology themselves
Sun Factory Project is built on emancipation and economic independence — offering low-tech solutions for self-reliance rather than dependency on capitalist systems.
Why GAFAM-Free?
Being fully open source and GAFAM-free is central to our identity. We oppose data exploitation and tech dependency, using only privacy-respecting tools: Mastodon, Pixelfed, Nextcloud, and GitLab. We also build our own tools when needed, with all data hosted in Switzerland by Infomaniak — no personal data collected or used, ever, protected by Swiss privacy law. This means smaller audiences but truly free knowledge without surveillance or paywalls.
The Four Pillars
Principle
Description
GAFAM-Free
Using only open-source tools and technologies, independent from big tech corporations (Google, Apple, Facebook, Amazon, Microsoft)
FAIR
Findable, Accessible, Interoperable, Reusable — knowledge that anyone can discover, use, adapt, and share
Low-Tech
Simple, replicable solutions with locally available materials — no need for expensive imports or specialized equipment
Open Source
All designs shared under CC BY-SA 4.0 (documentation) and CERN-OHL-S-2.0 (hardware) — copy, modify, and redistribute freely
From Knowledge to Action
These principles translate into concrete outcomes: communities can replicate the technology anywhere in the world, improve designs and share modifications, translate documentation into local languages, and connect with the global Sun Factory network. The instructions are free — the goal is independence.
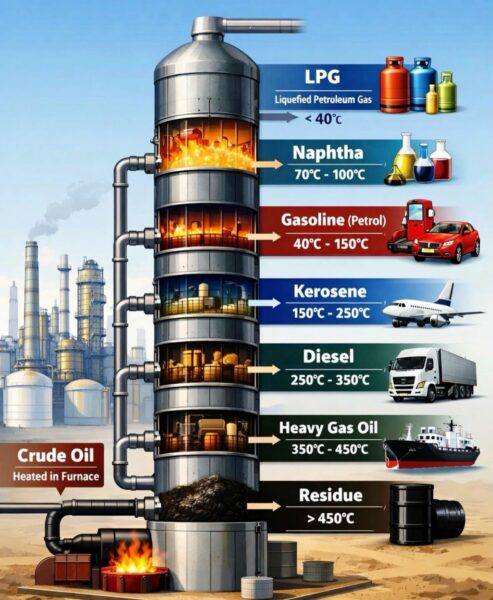
All conventional plastics originate from petroleum — a finite fossil resource. The process begins with naphtha (from Greek "naphtha" meaning flammable), a hydrocarbon mixture obtained during oil refining. Naphtha is "cracked" at high temperatures to produce monomers like ethylene and propylene, which are then polymerized into the plastics we use daily.
The renewable energy paradox: Even the transition to green energy requires enormous amounts of energy to manufacture solar panels, wind turbines, and batteries. This energy demand keeps refineries running — and naphtha is an unavoidable byproduct of petroleum refining. As long as we refine oil for any purpose, we produce naphtha. And naphtha becomes plastic. The ecological transition, paradoxically, guarantees continued plastic production for decades to come.
Despite growing awareness, global plastic production continues to rise. According to industry projections, plastic pollution is not expected to decrease — making local recycling solutions increasingly vital.
Plastic Types Used in Sun Factory
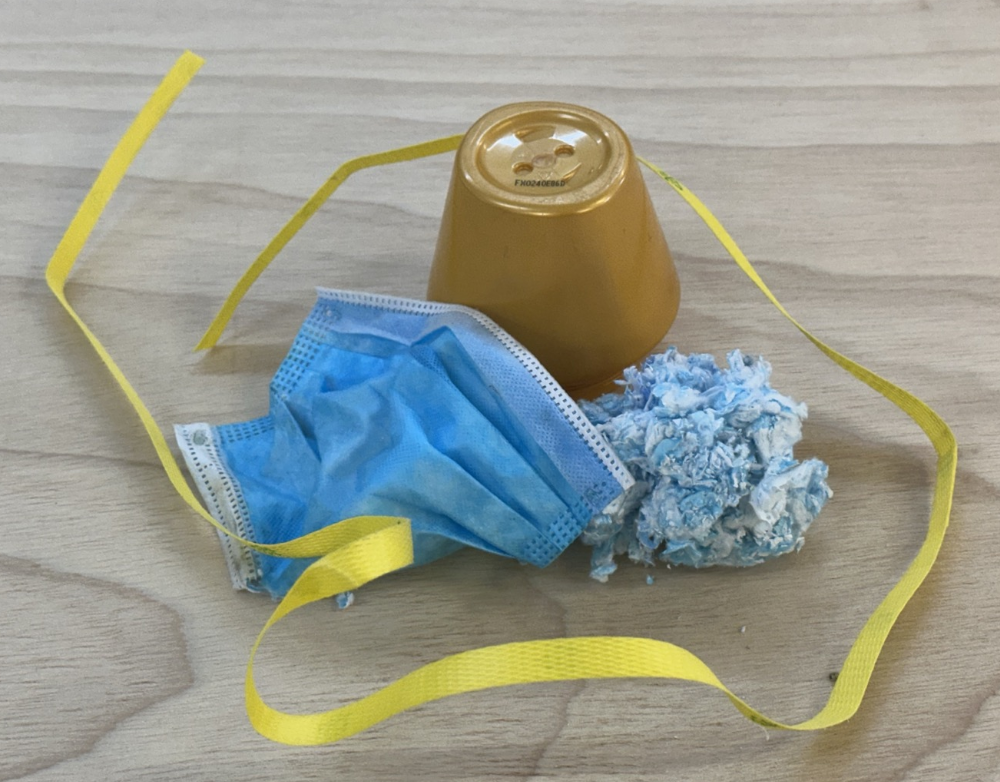
Not all plastics are equal. Sun Factory Project works primarily with thermoplastics — plastics that can be melted and reshaped multiple times without losing structural integrity:
Code
Type
Common Sources
Melting Range
2 ♻️
HDPE (High-Density Polyethylene)
Bottle caps, milk jugs, shampoo bottles
200–215°C
4 ♻️
LDPE (Low-Density Polyethylene)
Plastic bags, squeeze bottles, film
200–210°C
5 ♻️
PP (Polypropylene)
Food containers, straws, yogurt cups
195–210°C
7 ♻️
PLA (Polylactic Acid)
3D printing filament, bioplastic cups
200–210°C
⚠️ Avoid: PVC (#3), PS (#6), and mixed plastics (#7 except PLA) — they release toxic fumes when heated or don't melt properly.
Solar Plastic Injection is a Swiss initiative born from maker innovation in Geneva. In 2020, Marco Bernardo — combining African solar expertise with Swiss precision engineering — partnered with Yann Camponovo of PlastOK to create a breakthrough: melting plastic using only sunlight. On July 20, 2020, the complete process was published on Instructables — making it freely replicable worldwide.
The process uses four machines working together — all designs are open source under CC BY-SA 4.0: free to copy, adapt, and share, as long as you credit the authors and keep it open.
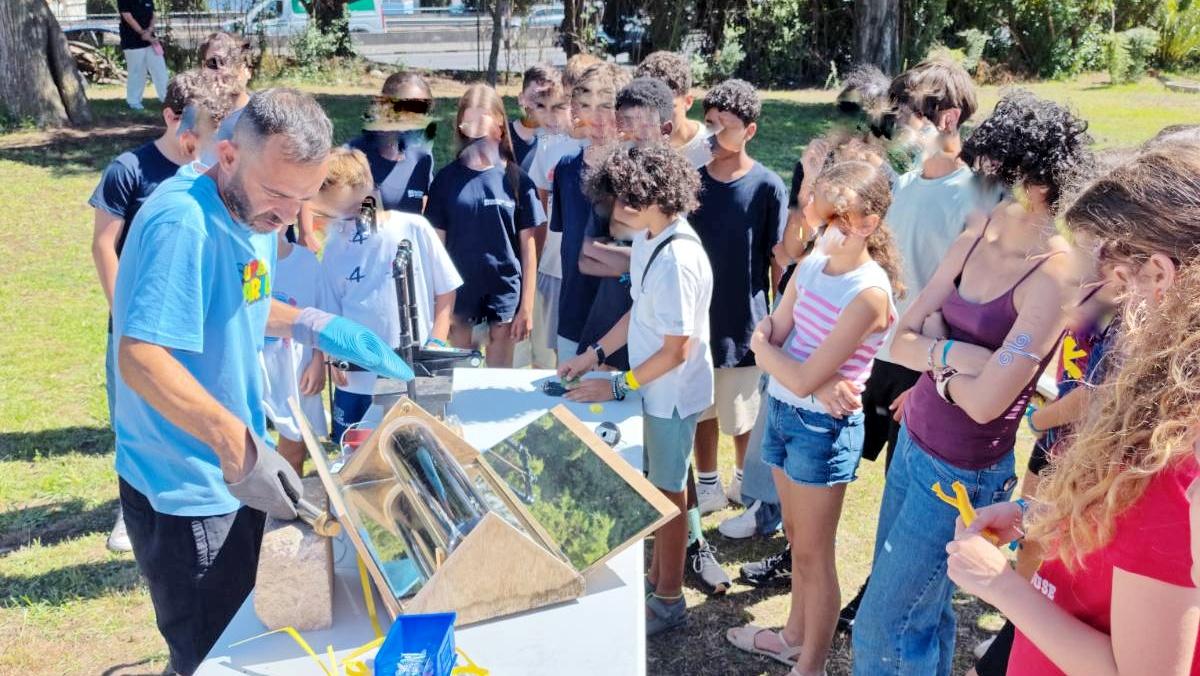
Sun Factory Project is designed for everyone — from curious children to professional makers. The technology is intentionally accessible: simple enough for educational workshops, yet powerful enough to generate income for independent artisans.
Workshops ages 8-16, introduction to solar energy and recycling
🏭 FabLabs & Makerspaces
Build and improve machines, share with the community
🌍 NGOs & Institutions
Sustainable development programs, community empowerment
💼 Independents & Entrepreneurs
Start a micro-business recycling plastic into products
🏘️ Local Communities
Collective workshops, waste reduction, local production
From Learning to Earning
The pedagogic approach works on two levels: for children, it's about discovery — understanding solar energy, the plastic challenge, and the power of open technology. For adults, it's also about economic independence — the same machines used in workshops can become tools for livelihood, transforming waste into sellable products with minimal investment.
What Participants Should Take Away
☀️ The Sun is a huge source of free energy we can capture and use
♻️ Plastic waste is a real challenge, but can become valuable raw material for new goods
🔧 Technology can be simple, open and shared for community independence
PART II — BUILD A SOLAR PLASTIC RECYCLING KIT
Step-by-step guides to build each machine — all designs are open source and replicable in any FabLab.
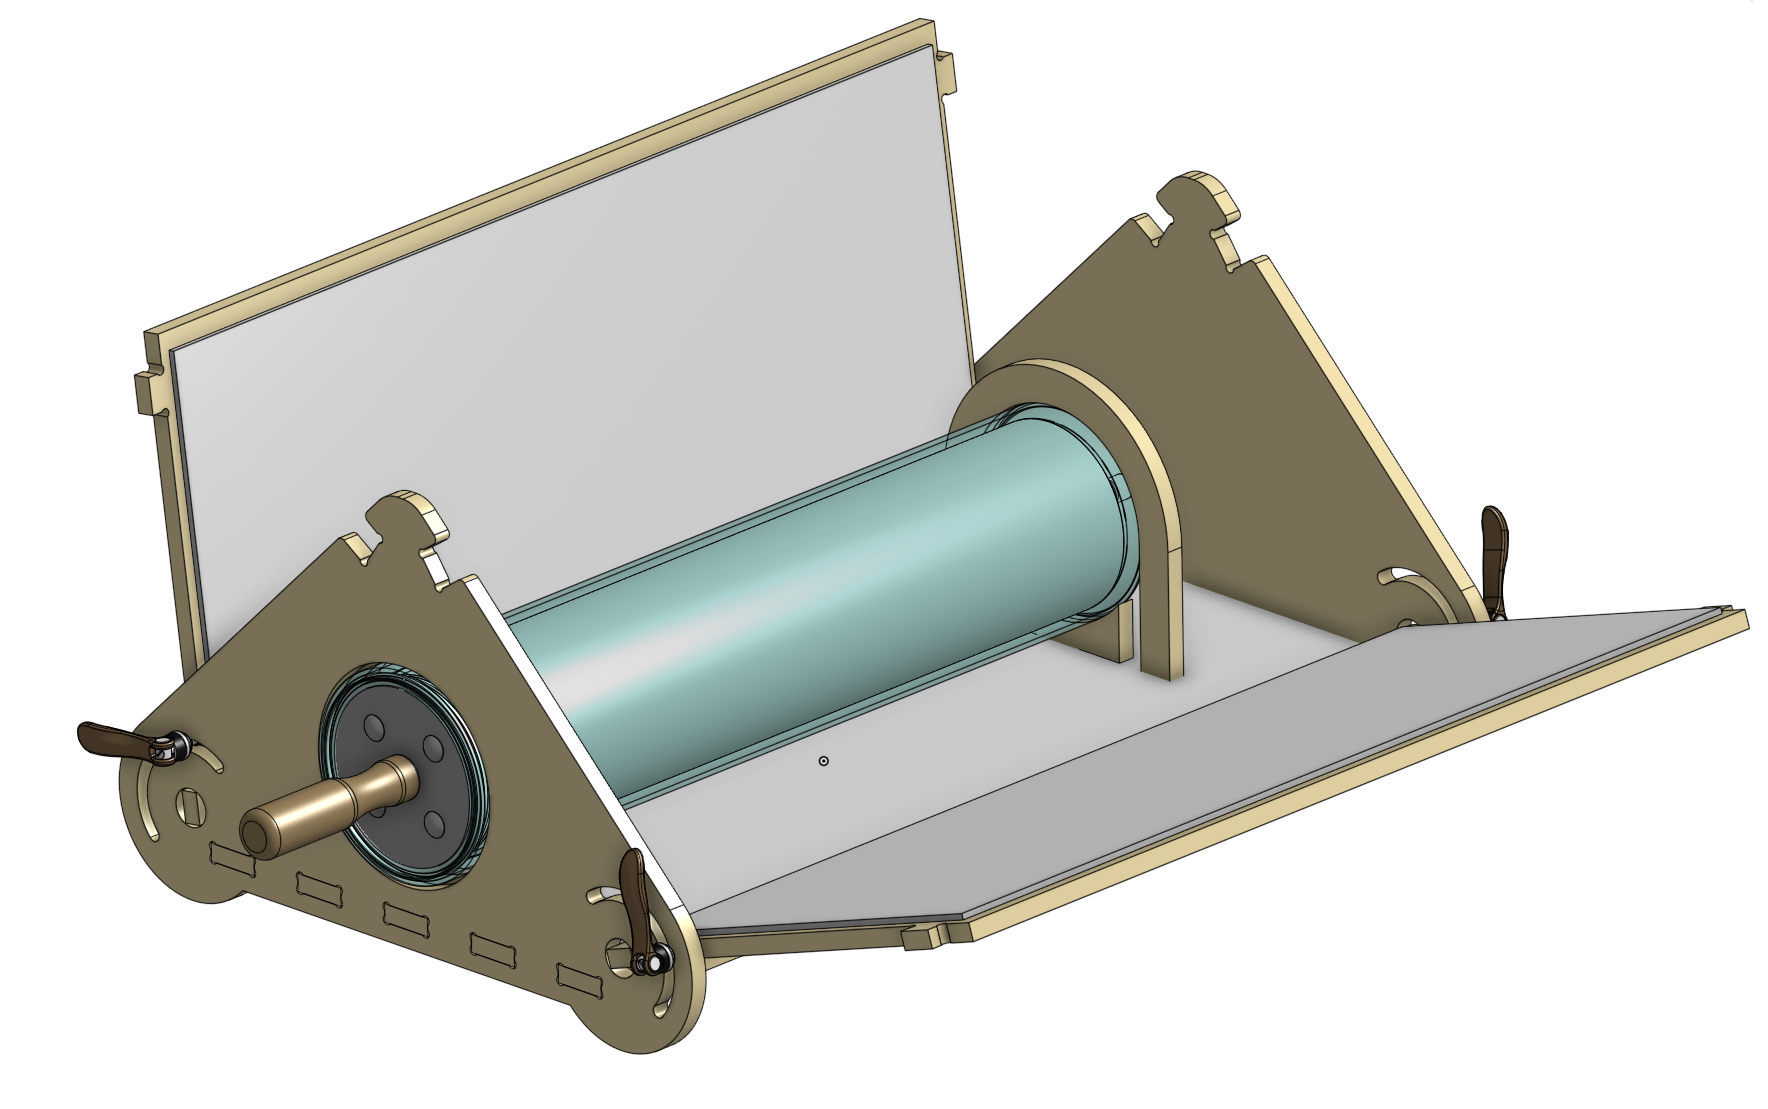
"The goal is to explain how version 3 of the solar concentrator was designed and built so that anyone can replicate it in a FabLab or digital fabrication lab."
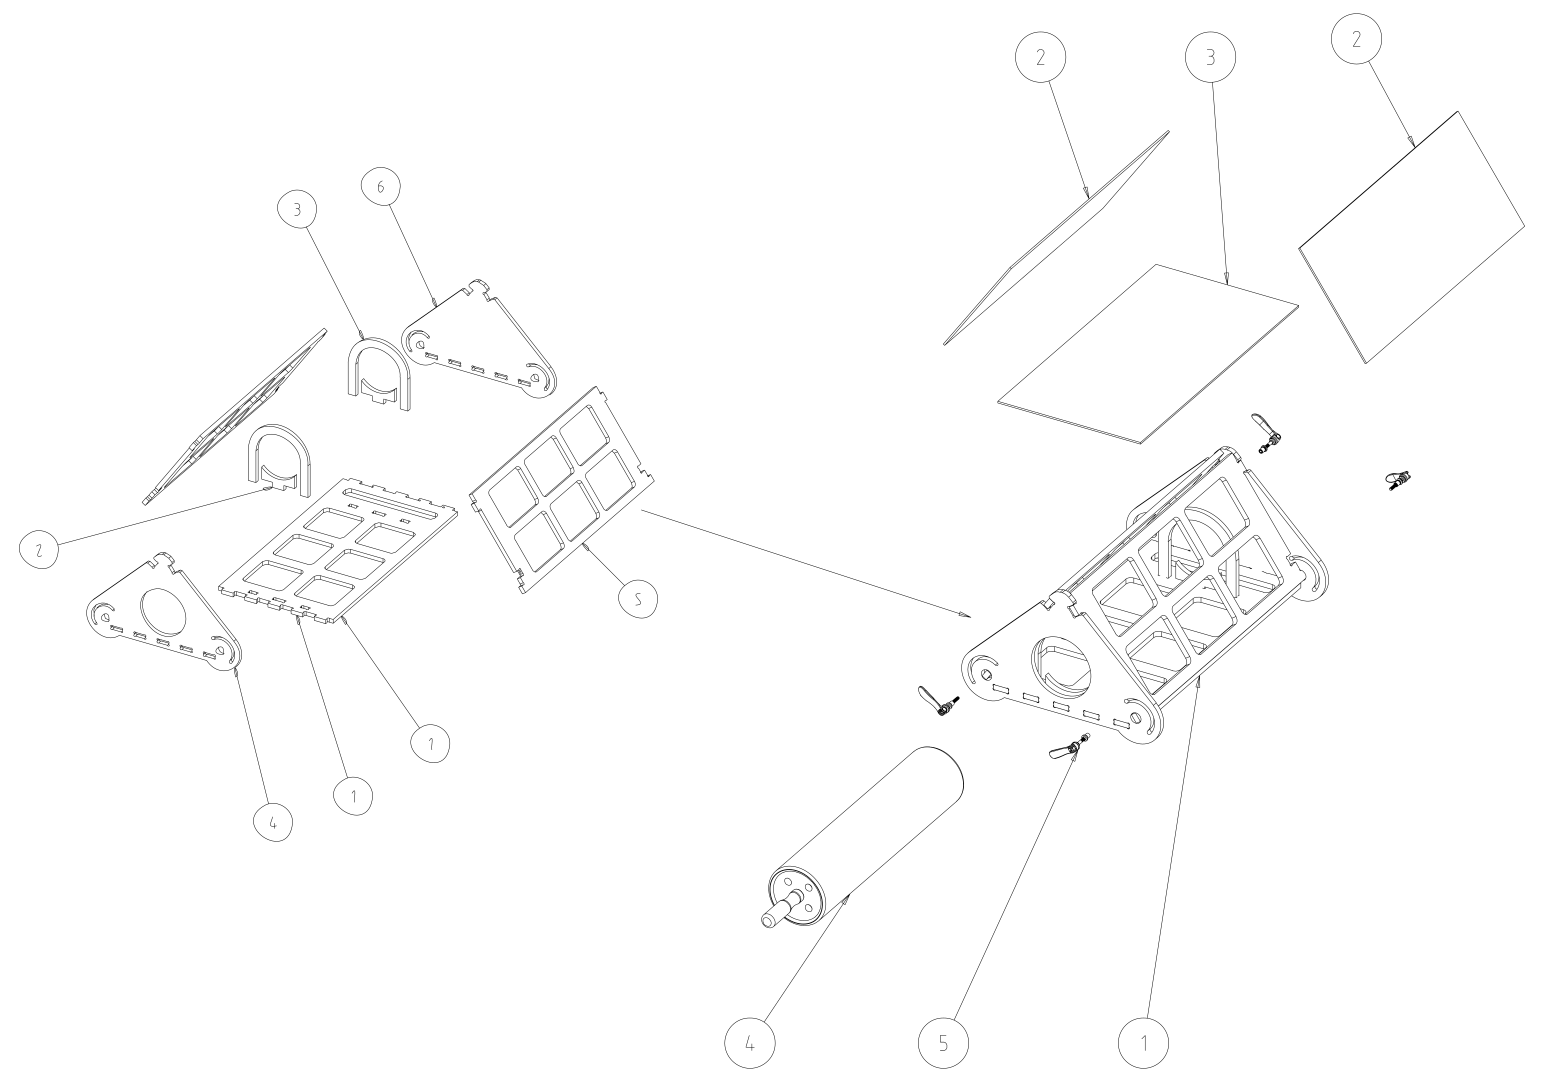
Bill of Materials (BOM)
Item
Component
Qty
Material
1
Wood Structure
1
—
1.1
↳ Bottom
1
MDF
1.2
↳ Tube support
2
MDF
1.3
↳ Tube holder
2
MDF
1.4
↳ Front
1
MDF
1.5
↳ Wing
2
MDF
1.6
↳ Back
1
MDF
2
Lateral mirror
2
MDF
3
Bottom mirror
1
HDF
4
Vacuum tube with layer
1
Glass
Tools Required
CNC Router (or jigsaw for manual cutting)
Drill with 6.5mm bit
Screwdriver
Safety glasses
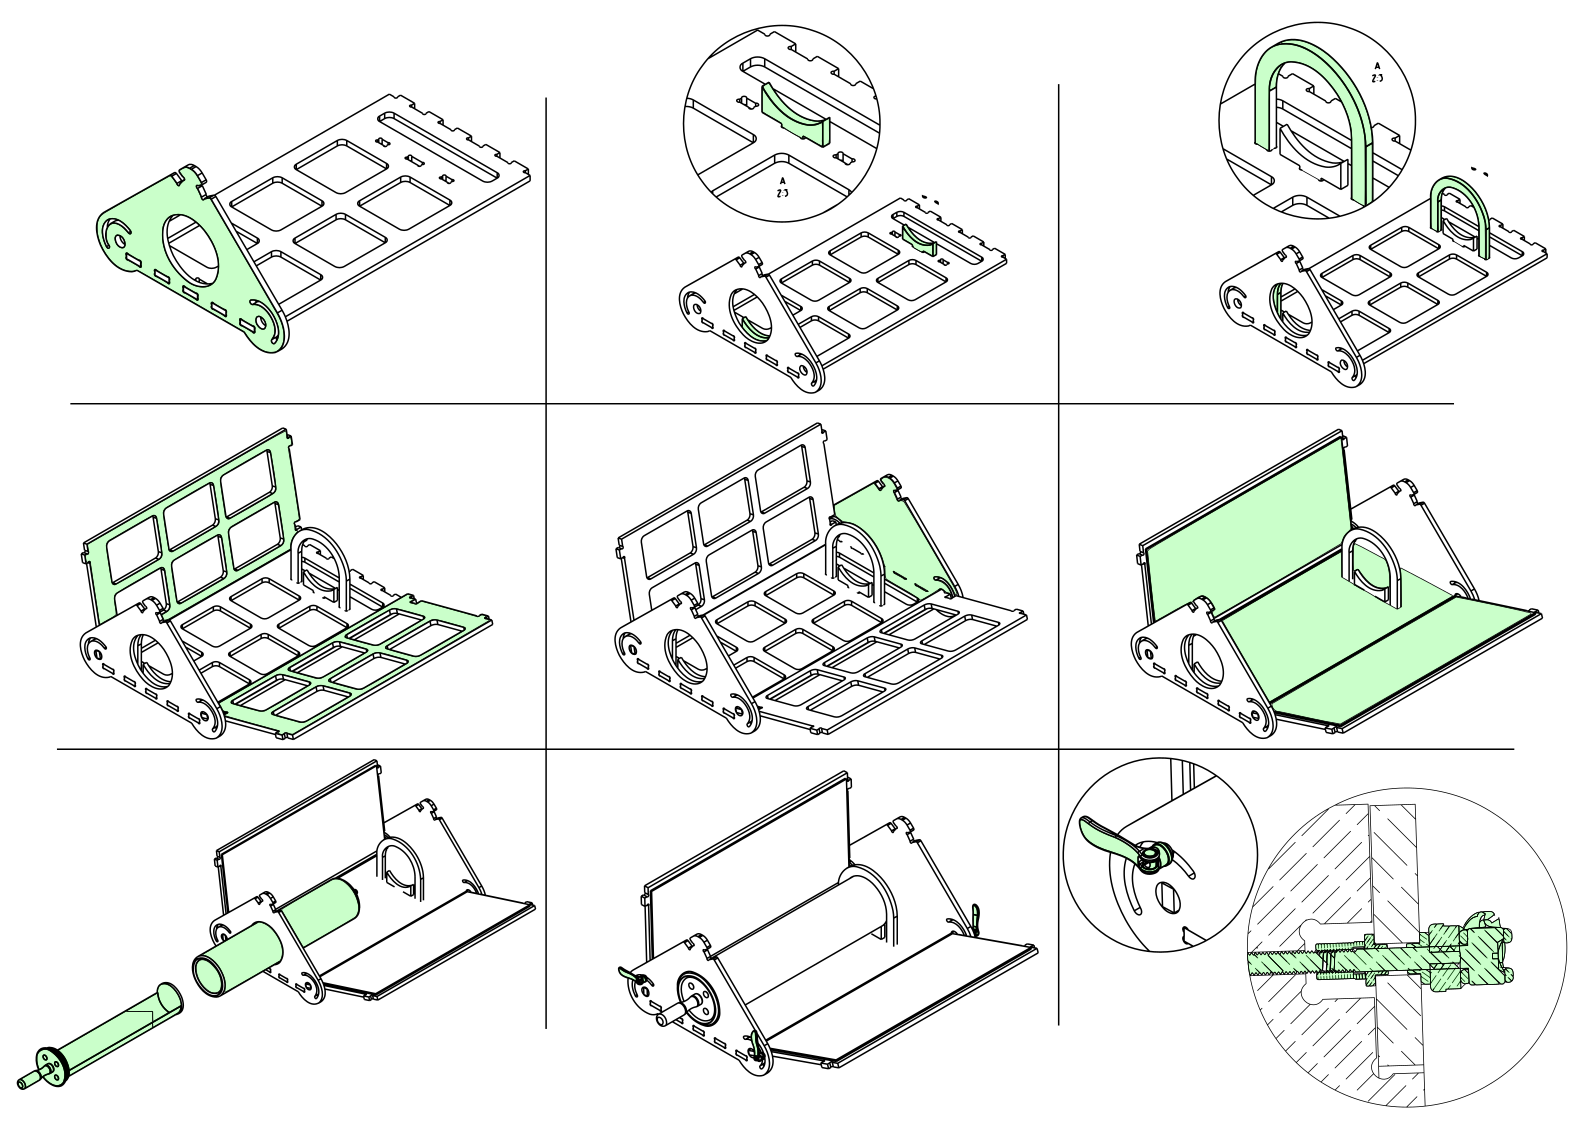
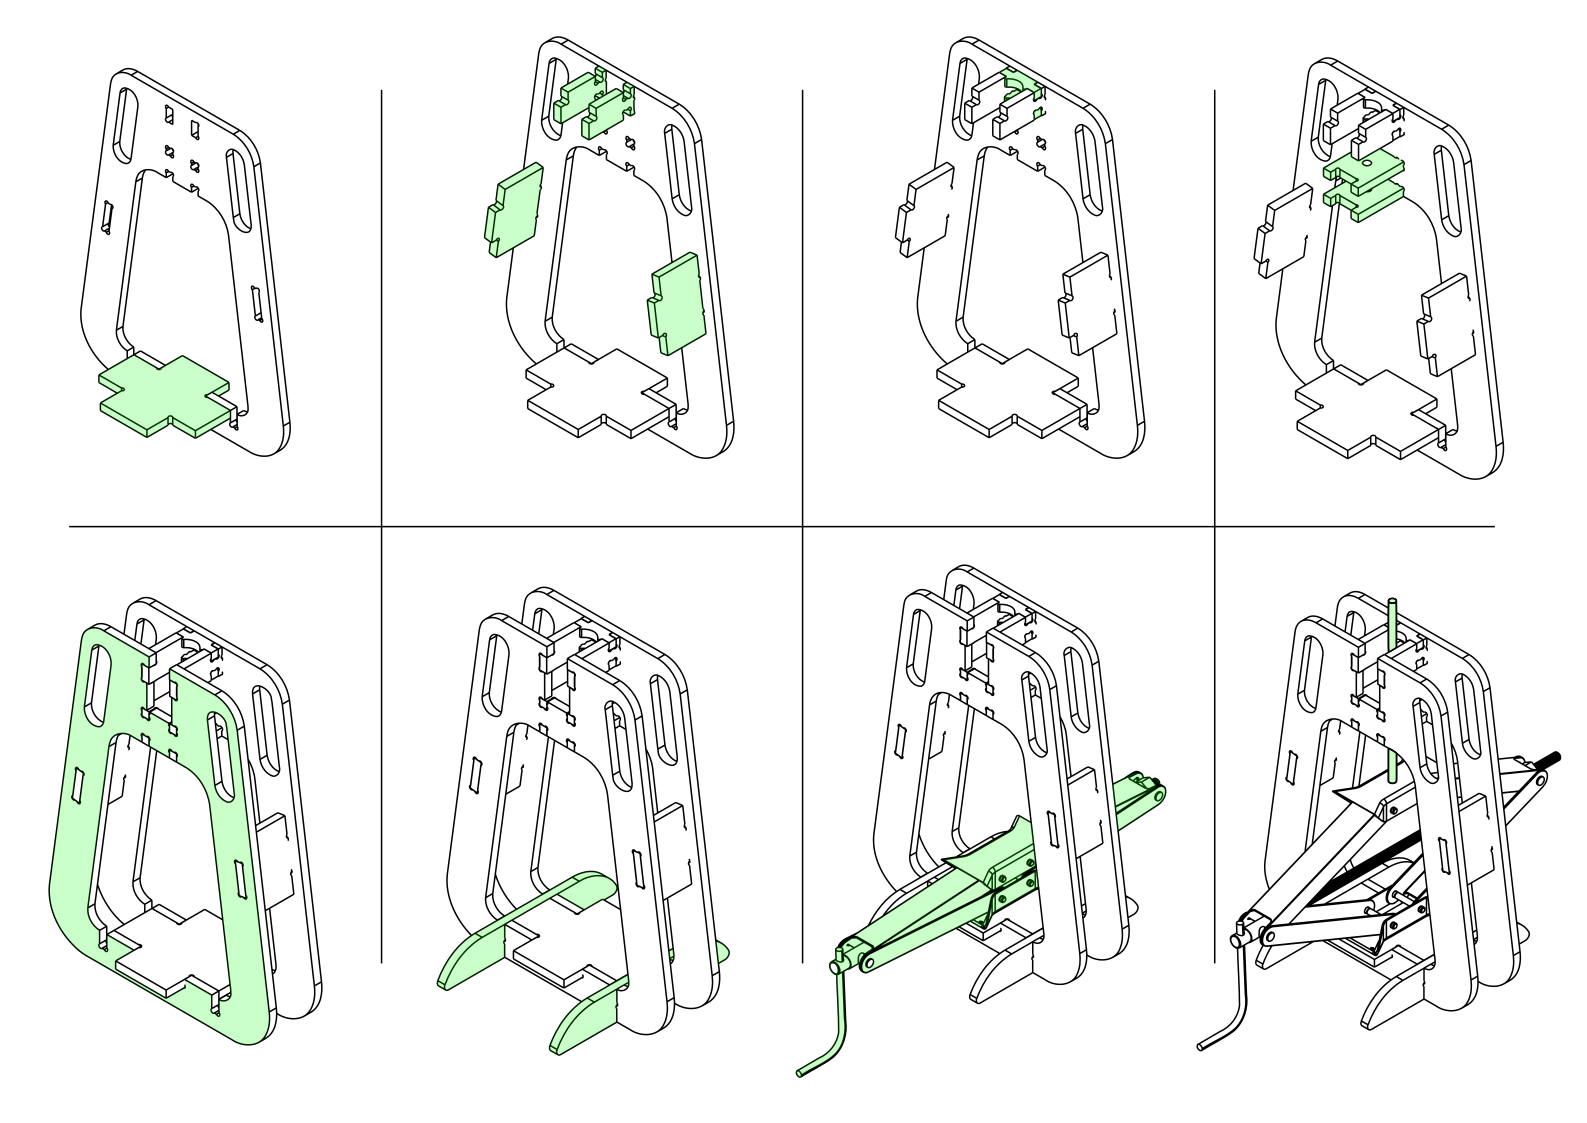
Assembly Steps
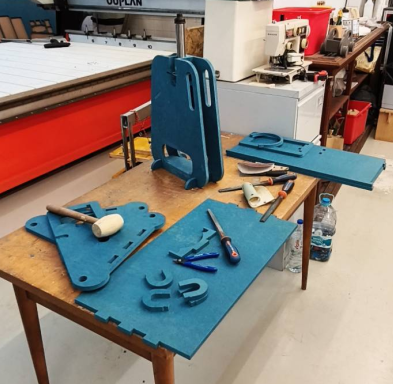
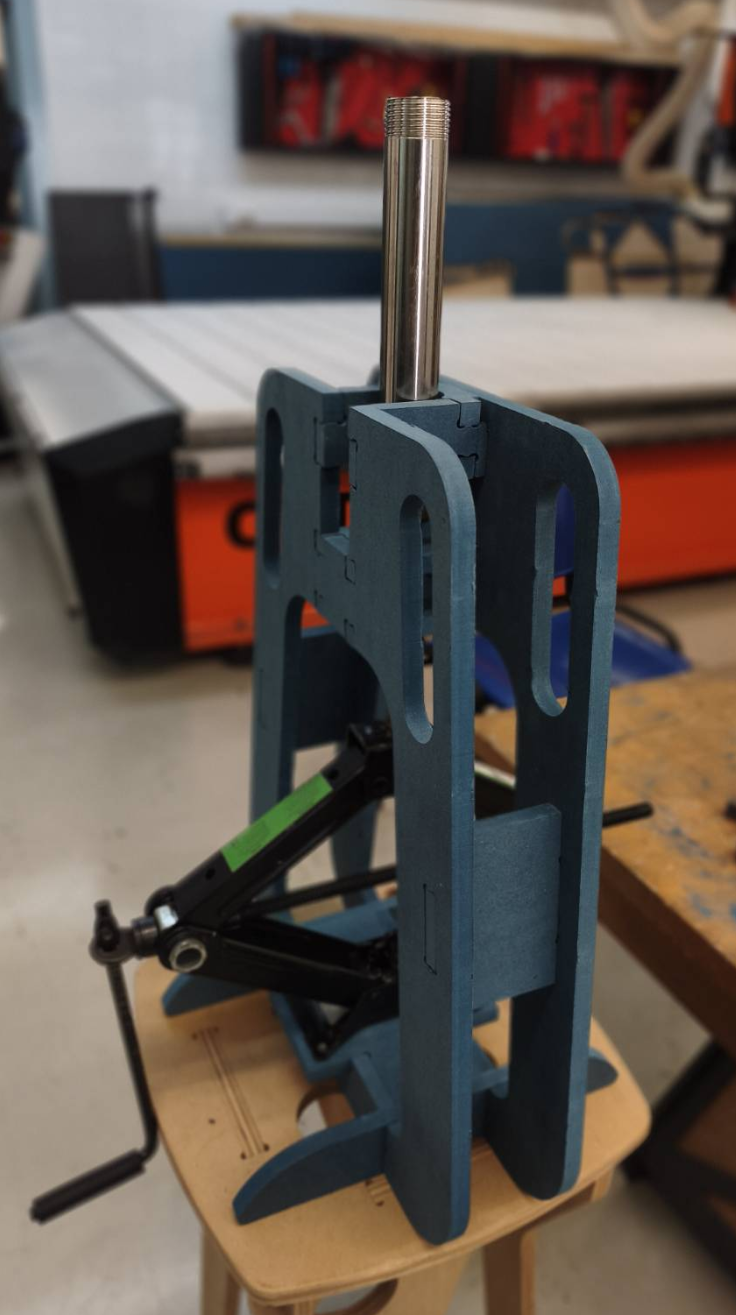
🔨 Assembly Method: All wooden parts are designed with interlocking joints, like LEGO pieces. Use a rubber mallet to gently tap the pieces together — no glue or screws needed for the main structure!
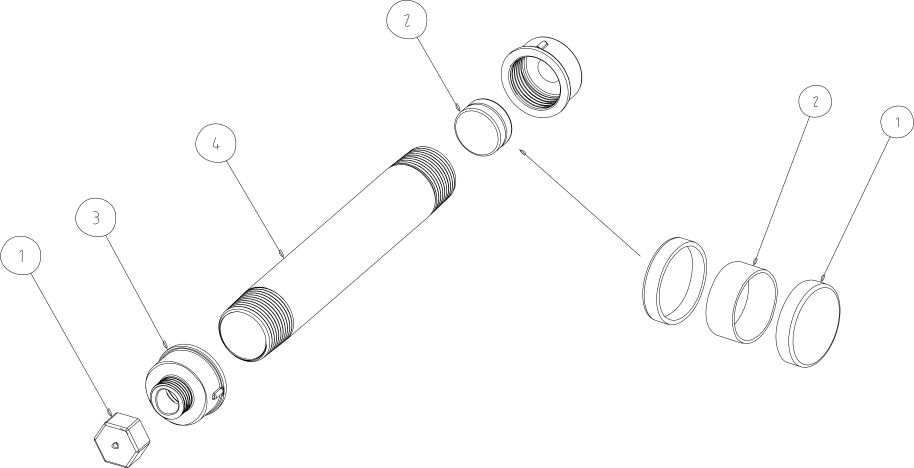
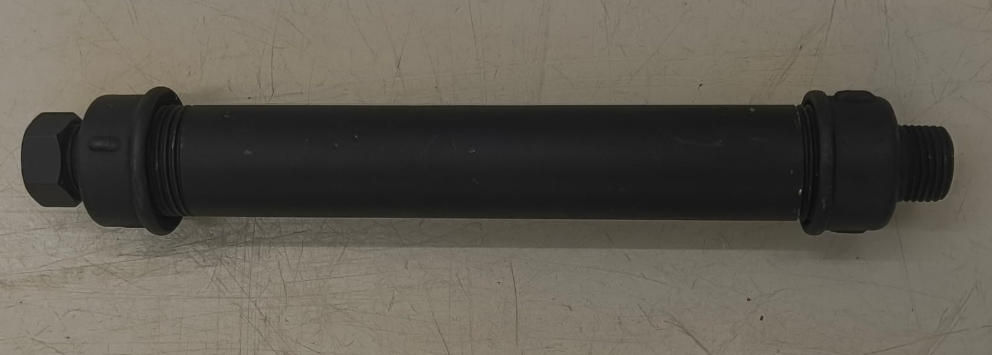
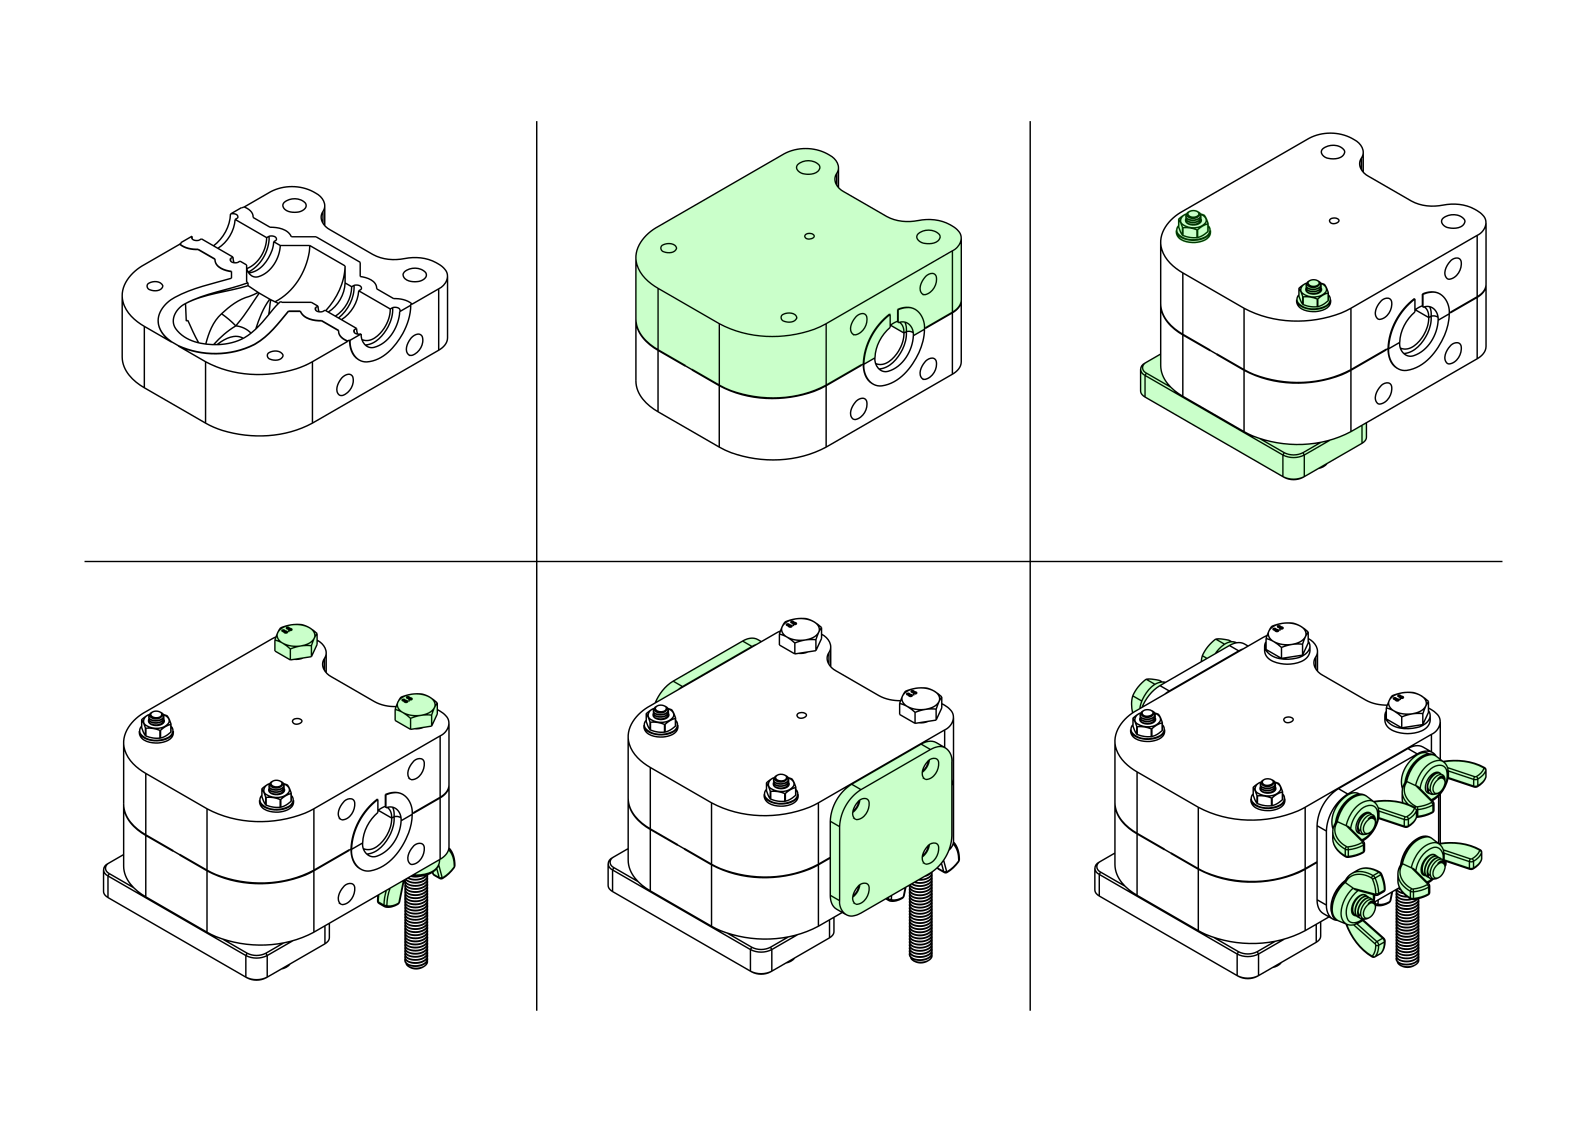
To facilitate the injection of recycled plastic using solar thermal energy, Plastok prototyped the metal cartridge injection process. Building upon Plastok's work, the cartridges developed by volks.eco are essential for portable injections and are worldwide DIY.
Bill of Materials
Item
Component
Qty
Material
1
1/2" cap with 3mm hole
1
Brass
2
Piston assembly
1
—
2.1
↳ Copper cap
2
Copper 1/2"
2.2
↳ Metal tube 20mm
1
Stainless Steel 3/4"
3
1" to 1/2" reducers
2
Brass
4
Threaded tube 1" × 20cm (both sides)
1
Stainless Steel
Tools Required
Metal file
Metal saw
Hammer for securing components
Sandpaper for polishing surfaces
Drill + 3mm metal drill bit
Assembly Steps
1
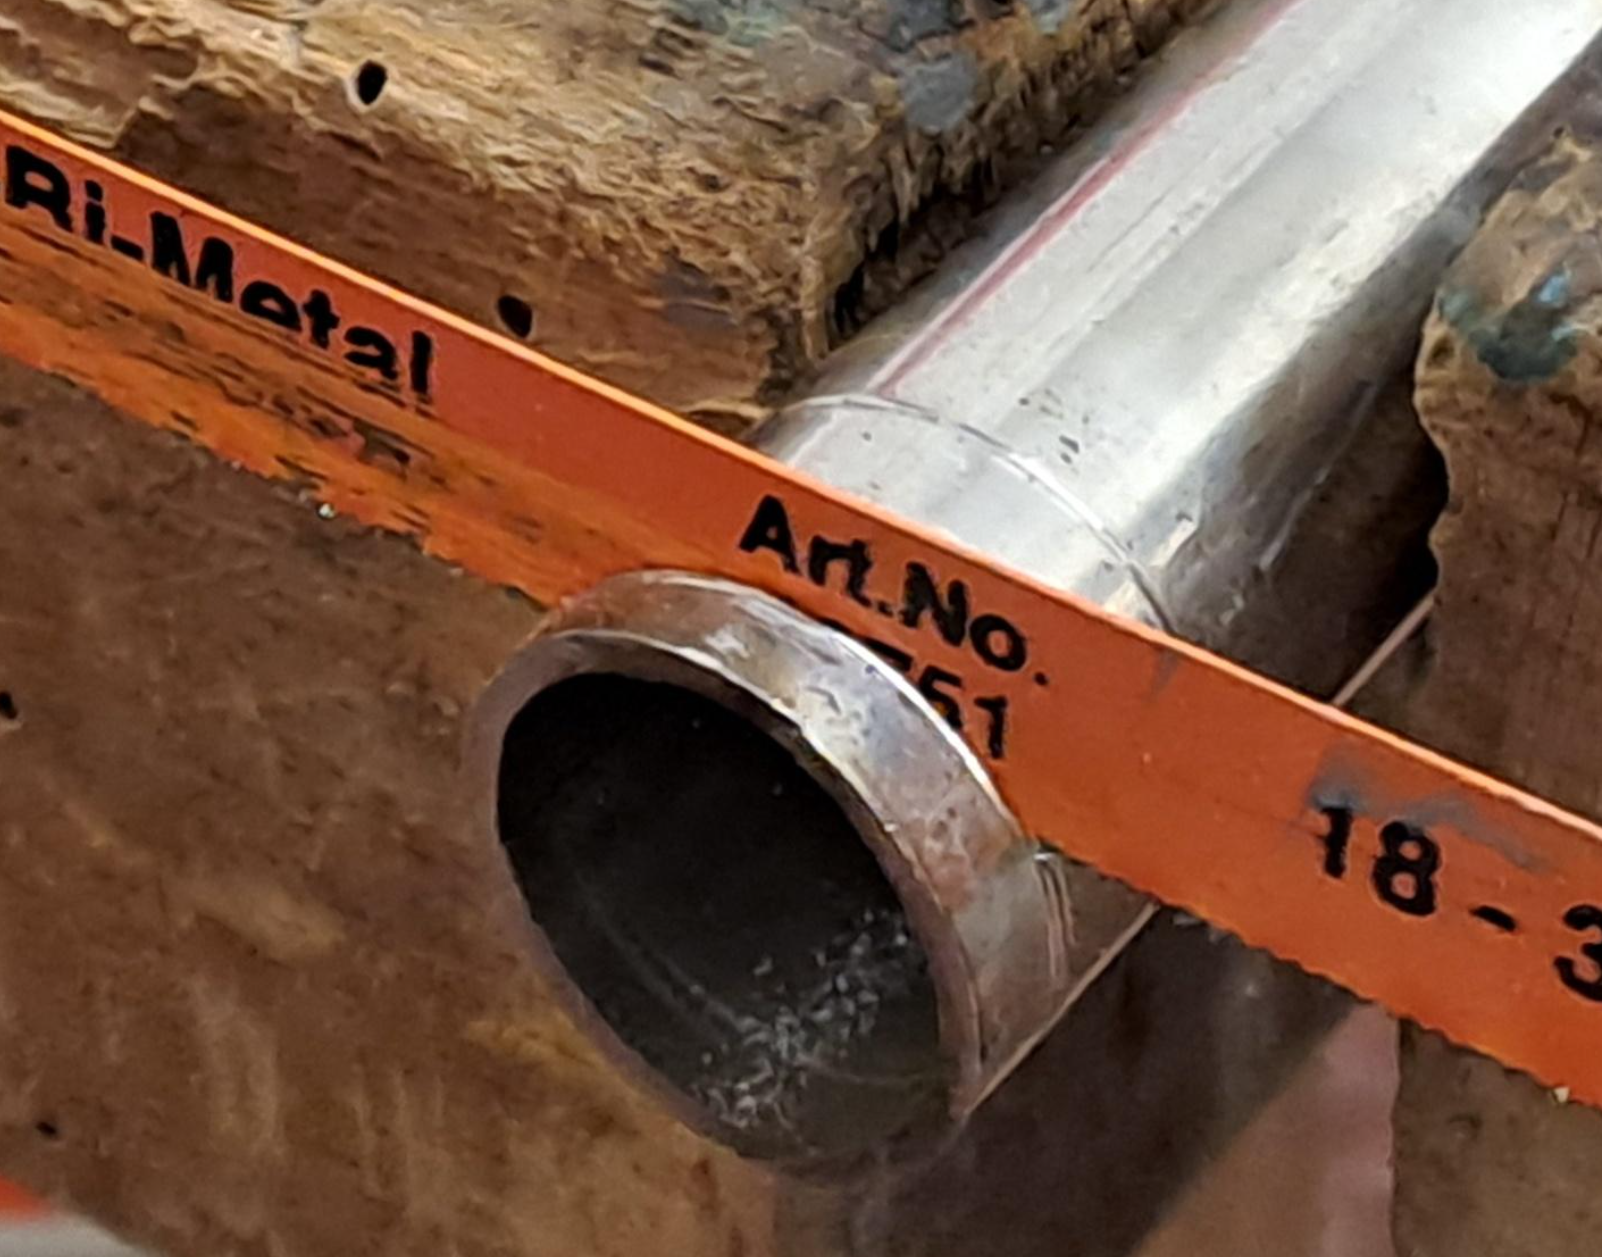
Clean the metal tube — Use the metal file to ensure that the tube ends are clean and free of any burrs. This step will facilitate the introduction of the piston.
2
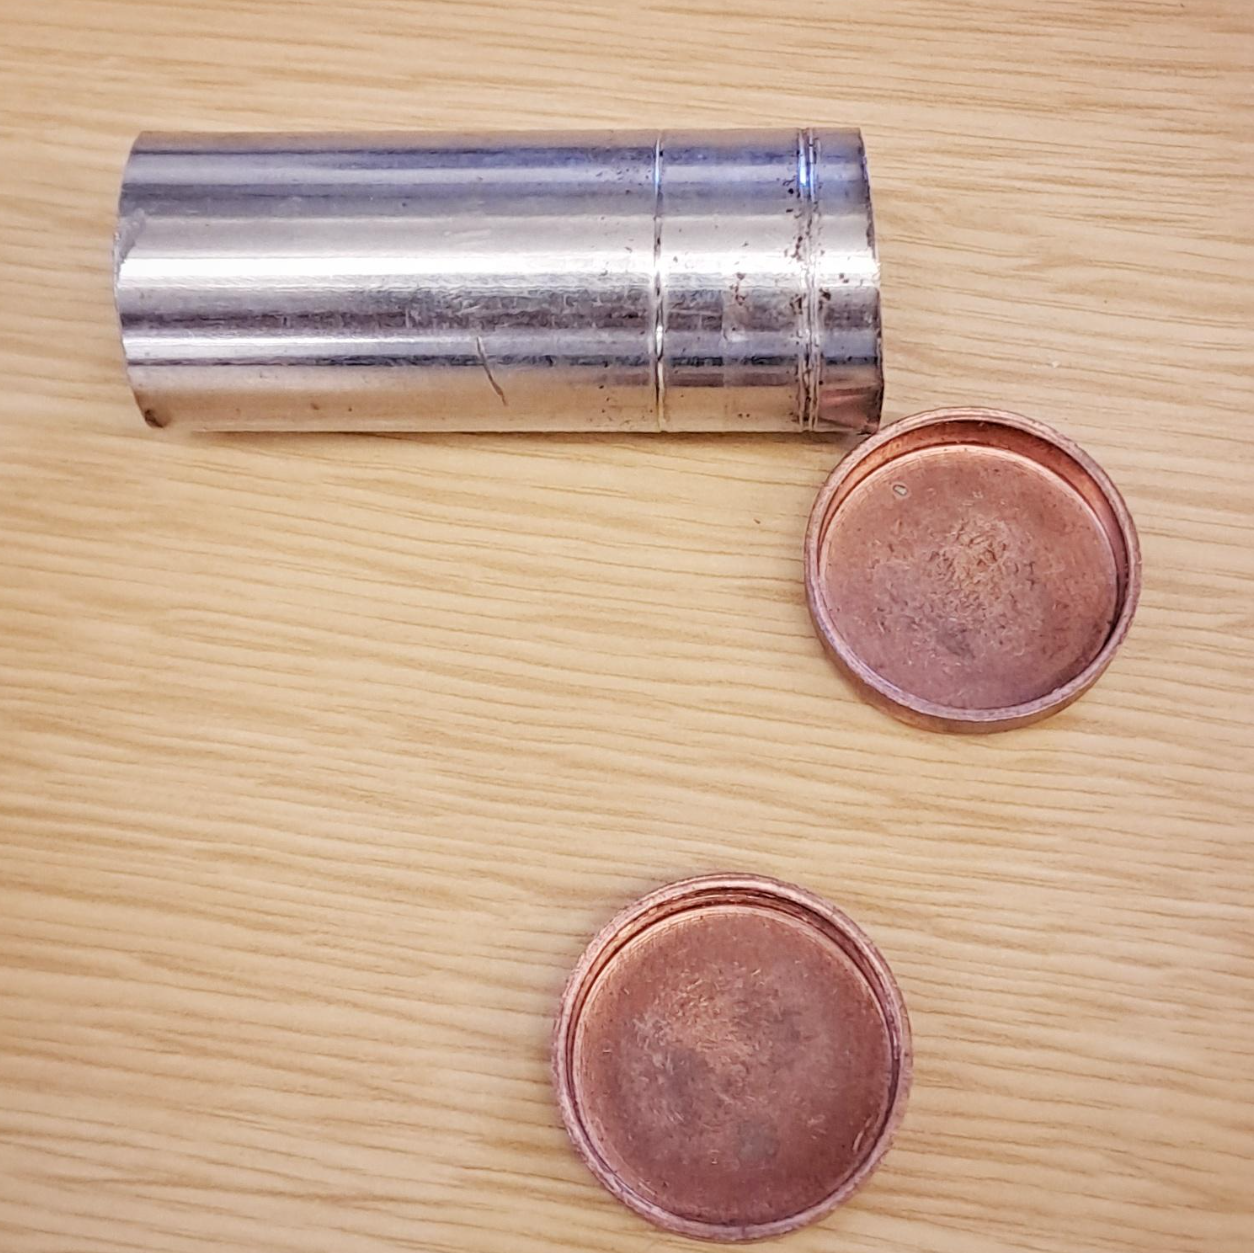
Create the piston — Using a metal saw, cut the 3/4" metal tube into 20mm sections. Use a metal file to clean the tube ends and ensure they are free of any burrs.
3
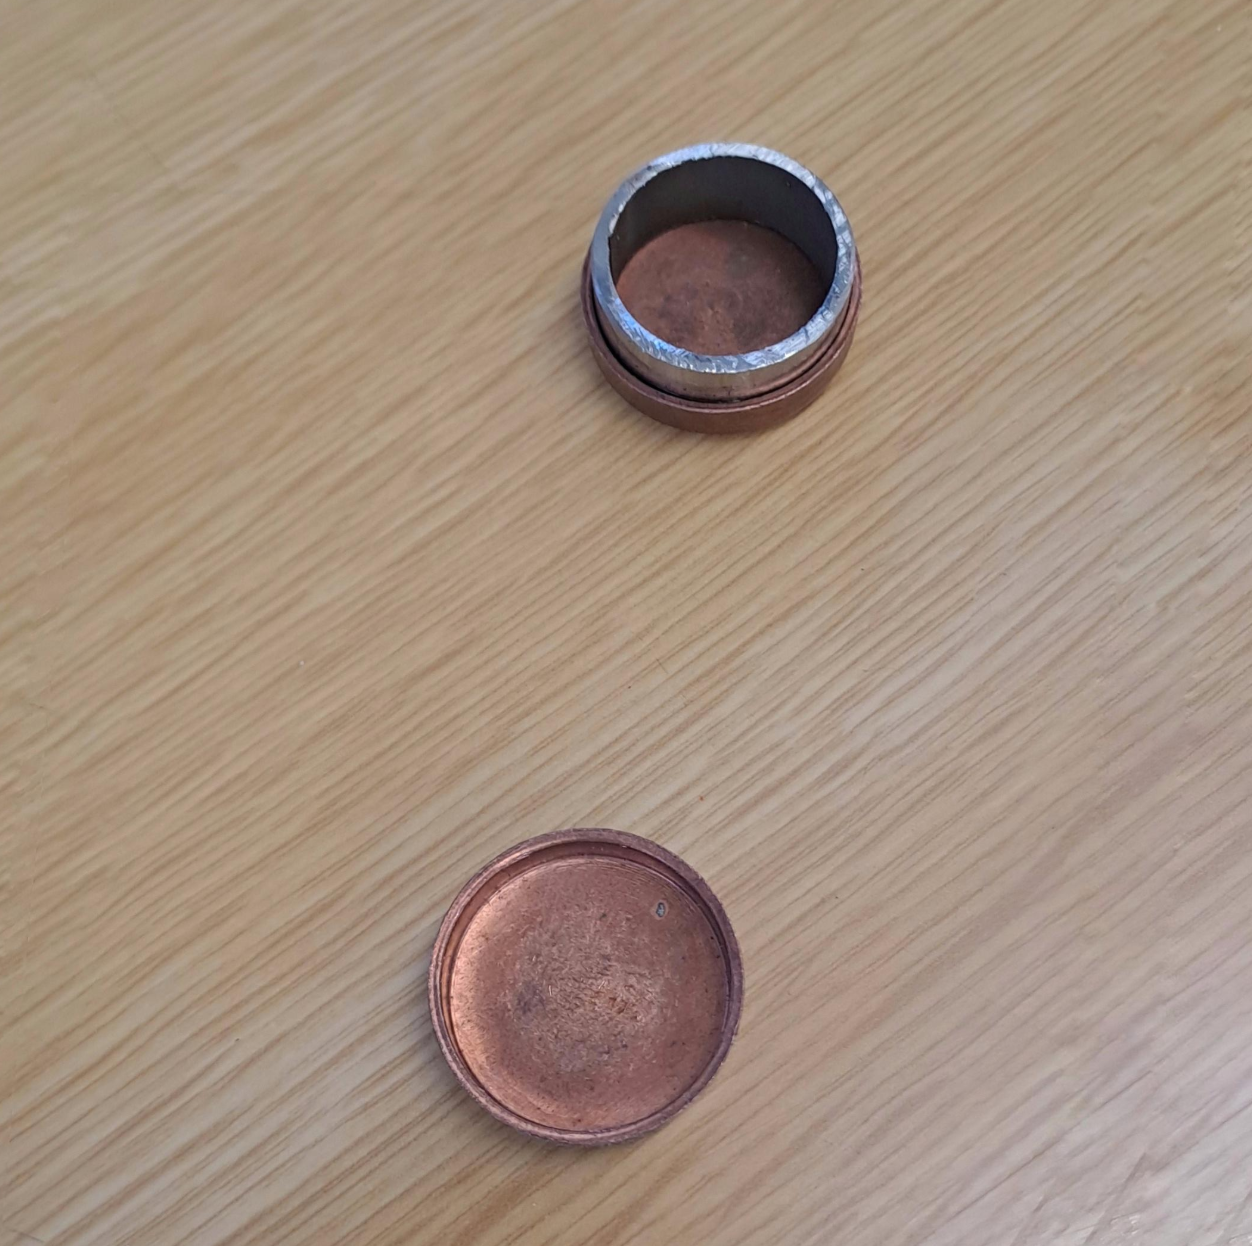
Assemble piston caps — Assemble the 20mm 3/4" metal tube with the two copper caps. Use the hammer and a flat surface to secure them.
4
Adjust piston fit — Use sandpaper to smooth the copper caps. Ensure that the piston moves smoothly within the tube without obstructions.
5
Drill cap hole — Drill a 3mm hole in the 1/2" brass cap. This hole is for inserting the temperature probe and prevents pressure build-up.
6
Final assembly — Insert the piston into the 1" tube, ensuring it sits snugly at the entrance. Attach the two 1" to 1/2" reducers, and finally attach the 1/2" brass cap.
💡 Tip: Paint cartridges black to increase solar absorption and reduce heating time!
"My goal was to create a new design that maintains the open-source, replicable nature of the project while staying intuitive to use, robust in operation, and easy to manufacture in a FabLab environment."
Burning mirrors: legend of Syracuse — focused sunlight to burn Roman ships
Sundial: clock using light and shadow
The Plastic Challenge
Many types of plastic, each with different properties
Each person ingests about 5 grams of microplastic per week
In 2022, only 9.5% of plastic came from recycling
Sun Factory Project Solution
Solar concentrator reaches up to 300°C
Manual injection press pushes melted plastic into molds
Result: new useful objects from waste plastic
💡 Presentation Tips:
Ask questions: "How big do you think the Sun is?"
Use one strong image per slide, very few words
Remind them twice that quiz questions come from the talk
Connect to their lives: point at a plastic bottle in the room
3.3 Activity 2: Team Quiz Game (20 min)
Basketball Challenge + Kahoot
Turn assessment into a physical game! Before answering each question, teams throw plastic "waste" into a trash-can basket. Successful shot = team runs to answer.
Materials
Trash can or basket
Lightweight plastic pieces (bottle caps)
Projector for Kahoot display
One device for educator (controls answers)
Recycled-plastic prizes for winners
Game Rules
Split into 3 teams of 3-4 people
Each team gets plastic pieces to throw
For each question: team scores basket → runs to educator → selects answer
Educator controls single device (keeps game fair)
Award recycled-plastic prizes to winners
Sample Quiz Questions
#
Question
Answer
1
How much wider is the Sun compared to Earth?
About 109 times
2
How long does sunlight take to reach Earth?
About 8 minutes
3
What temperature can the solar concentrator reach?
Up to 300°C
4
How much microplastic do we ingest weekly?
About 5 grams
5
What percentage of plastic is recycled?
About 9.5%
6
What does Sun Factory Project give people for free?
Instructions to build machines
3.4 Activity 3: Live Demonstration (30-40 min)
Step-by-Step Process
1
Setup: Place parabolic mirror in sunny spot, all materials on heatproof table, PPE on
2
Show plastic: Display clean pieces (bottle caps), explain safe plastics only
3
Heat plastic: Place in cartridge, insert in solar concentrator. Narrate as it melts
4
Inject into mold: Transfer to injector, push into mold. Explain each step
🌡️ Temperature Strategy: Heat plastic 15-20°C above the melting point. Plastic cools rapidly once removed — a cartridge loses optimal temperature within 45-50 seconds. After this window, the plastic becomes too viscous and excessive force could crack your resin mold. Speed matters!
5
Cool and reveal: Wait 2-5 minutes, open mold, show result!
💡 Make it Engaging:
Narrate every step in simple words
Invite predictions: "What shape do you think will come out?"
Pass around cooled sample objects made earlier
Connect back: "Remember the machines from the slides?"
Using the Cartridge — Detailed Steps
1
Fill the cartridge — Open on the opposite side of the piston (typically the brass cap side). Apply pressure to the material during filling.
2
Close the cartridge — Connect the second reducer and fill it. Seal with the 1/2" brass cap, ensuring the cap has a vent hole.
3
Injection — Attach the 1/2" cartridge output to the mold, connect to the manual injector, and use the piston plunger to perform injection.
4
Remove reducers — Detach the reducers while still hot (easier to remove). Handle with caution due to elevated temperature.
Extra Activity: Archimedes Mirror Boat
If time allows, demonstrate the legend! Build small boats with paper sails, use mirrors/lenses to concentrate sunlight and burn the sails — just like Archimedes allegedly did to Roman ships.
3.5 Facilitation Tips
Language Barrier
Show, don't only tell: demonstration crosses language barriers
Short sentences, one idea at a time
Put key words on slides in audience's language
Use images, not text walls — pictures need no translation
Keeping Energy High
Change activity type often: talk → watch → play
20 minutes is max for sitting and listening
Ask questions, invite predictions
If Something Goes Wrong
Demo fails: show prepared objects, keep talking, take questions
Internet fails: run quiz on paper or by show of hands
Weather cloudy: show video of process, or use infrared lamp
Adaptations
Group
Adaptation
Younger (8-11)
Shorter presentation, simpler words, more pictures, focus on "magic"
Older (16+)
Go deeper: plastic types, temperatures, circular economy, open-source
Short version (45 min)
Quick talk + demo + 5-question quiz
Full day
Add hands-on mold design or plastic sorting activity
3.6 Safety Guidelines
🛑 Golden Rules:
A trained adult runs the demo — only they touch hot plastic/machines
Children behind barrier — never next to heat source
Ventilate well — work outdoors or strong airflow
Never leave heat unattended
Never look directly at the Sun
Safe Plastics Reference
Code
Plastic
Safe?
Notes
2 · HDPE
High-density polyethylene
✅ Safe
Bottle caps, milk bottles — best choice!
4 · LDPE
Low-density polyethylene
✅ Safe
Bags, film
5 · PP
Polypropylene
✅ Safe
Containers, caps — excellent
6 · PS
Polystyrene
⚠️ Care
Ventilate very well
3 · PVC
Polyvinyl chloride
❌ NEVER
Releases toxic fumes!
1 · PET
Bottles
⚠️ Avoid
Hard to injection-mold
🚫 CRITICAL: Never heat PVC (code 3) or unknown plastics. PVC releases toxic, corrosive gases!
 Solar Plastic Recycling